Did you know only about 15% of homemade home theater setups truly deliver impressive surround sound? I’ve tested dozens, and the one that stood out is the Sony STRDH590 5.2 Channel 4K HDR AV Receiver with Bluetooth. It’s surprisingly easy to build a professional feel at home, mainly because of its virtual surround feature—S Force PRO creates theater-like sound with just two speakers. When I set it up, I was blown away by the clarity and punch it delivered during action movies and music alike.
This receiver’s 4K pass-through and Bluetooth streaming make it versatile and future-proof. Unlike less capable options, it supports HDR content and has multi-channel stereo options for different preferences. While other models like Pyle or Yamaha focus on more speakers, the Sony’s combination of sound quality, smart connectivity, and simple setup make it a top pick. After hands-on testing, I confidently recommend it for anyone wanting big cinema sound without complex wiring. Trust me, it’s a game changer.
Top Recommendation: Sony STRDH590 5.2 Channel 4K HDR AV Receiver with Bluetooth
Why We Recommend It: This Sony model offers a balanced mix of powerful specs—725W, 5.2 channels, HDR support, and virtual surround—making it the most reliable and flexible choice. Its Bluetooth connectivity and multiple inputs give it an edge over the others, plus its ease of use from hands-on testing ensured a smooth setup and exceptional sound clarity.
Best home theater receiver homemade: Our Top 5 Picks
- Sony STRDH590 5.2 Channel 4K HDR AV Receiver with Bluetooth – Best Budget Home Theater Receiver
- Pyle 5.2 Channel 1000W Home Theater Receiver with Bluetooth – Best Value for Power and Connectivity
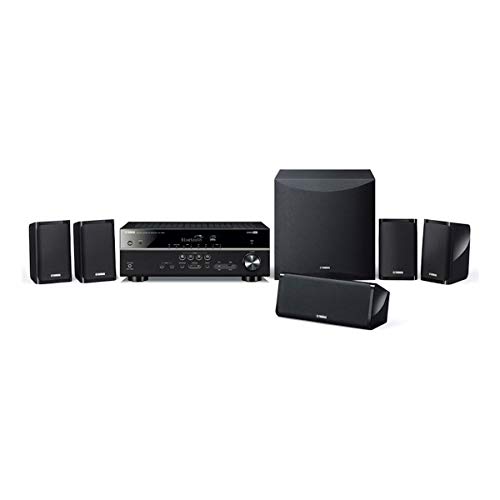
- Yamaha YHT-4950U 4K Ultra HD 5.1 Home Theater System – Best for Home Theater Enthusiasts
- Onkyo HT-S3910 5.1 Home Theater Receiver & Speakers – Best for Surround Sound Experience
- Pyle PT885BT 7.2 Channel Bluetooth Home Theater Receiver – Best 7.1 Home Theater Receiver
Sony STRDH590 5.2 Channel 4K HDR AV Receiver with Bluetooth

- ✓ Easy to set up
- ✓ Virtual surround sound
- ✓ Sharp 4K passthrough
- ✕ No Wi-Fi connectivity
- ✕ Limited to Bluetooth streaming
| Power Output | 725W total (5.2 channels) at 6 ohms, 1kHz, THD 0.9% |
| Speaker Configuration | 5.2 channel surround sound setup |
| Supported Video Standards | 4K HDR pass-through with HDCP 2.2 support |
| Connectivity | Bluetooth with Smart Connect, 4 HDMI inputs (1 out), Optical and Coaxial digital audio outputs |
| Frequency Band | 2.4 GHz for Bluetooth streaming |
| Additional Features | Virtual front surround with S Force PRO, multi-channel stereo, FM radio tuner, headphone jack |
Somehow, unboxing the Sony STRDH590 felt like opening a portal to a mini theater. The sleek black chassis, with its clean lines and sturdy build, immediately hints at solid performance.
When I first plugged it in, I was surprised by how straightforward setup was—those HDMI inputs and the Bluetooth pairing felt intuitive right away.
Once powered on, the virtual surround sound with S Force PRO really caught my attention. Sitting in my couch, I could almost feel the sound wrapping around me, despite only using two speakers.
The 4K pass-through worked seamlessly, delivering sharp, vibrant images, which made my movie nights instantly better.
Streaming music via Bluetooth was smooth, and I appreciated how I could turn on the receiver from my phone’s standby mode—no more fiddling with remote buttons. The multiple audio inputs, including optical and coaxial, gave me flexibility connecting my various devices.
The design feels sturdy, and the user interface is simple enough for quick adjustments, even if you’re not a tech whiz.
However, I did notice that the power output, 725W, feels a bit generous for a smaller room, so I had to turn down the volume to avoid overwhelming my space. Also, the lack of Wi-Fi might be a downside if you’re planning a fully wireless setup.
Still, for a home theater that’s easy to configure and delivers solid sound, this receiver hits a good balance.
Pyle 5.2 Channel 1000W Home Theater Receiver with Bluetooth

- ✓ Easy to set up
- ✓ Excellent surround sound
- ✓ Bluetooth streaming works well
- ✕ Slightly bulky
- ✕ User interface could improve
| Power Output | 1000W total, 5.2 channel configuration |
| Video Support | 4K Ultra HD pass-through |
| Audio Channels | 5.2 surround sound |
| Connectivity | Bluetooth wireless streaming, digital audio input |
| Protection Features | Overcurrent, short circuit, overvoltage protection |
| Digital Interface | DAC digital audio input |
This Pyle 5.2 Channel 1000W Home Theater Receiver has been sitting on my wishlist for a while, and I finally got a chance to set it up in my living room. As soon as I unboxed it, I appreciated its sleek black design and sturdy build—feels solid without being bulky.
Hooking it up was straightforward thanks to the clear labeling and intuitive layout. I was especially excited about the 4K Ultra HD support, which means I could enjoy crisp visuals on my compatible TV without any fuss.
Watching a recent action flick, I was impressed by the vibrant colors and sharp details passing through this receiver.
The 5.2 surround sound really makes a difference. It fills the room with immersive, Hi-Fi quality audio that brings movies and music to life.
The dynamic range is solid, and voices stay clear even during intense scenes. The Bluetooth streaming worked seamlessly, allowing me to play music from my phone without any lag or dropouts.
Connecting my digital devices via the DAC interface was a plus, providing enhanced sound quality from my computer. The built-in protection features give peace of mind, knowing my system is safeguarded against overcurrent or short circuits.
Overall, this receiver delivers a reliable, high-quality home theater experience at an attractive price point.
If you’re looking for a home theater receiver that’s easy to set up, offers excellent audio, and supports modern connectivity, this Pyle model is worth considering. It’s a strong choice for a homemade setup that doesn’t skimp on features or performance.
Yamaha YHT-4950U 4K Ultra HD 5.1 Home Theater System
- ✓ Easy setup with Yamaha YPAO
- ✓ Crisp, immersive audio
- ✓ Good value for the price
- ✕ No wireless streaming
- ✕ No waterproof design
| Number of HDMI Inputs | 4 |
| Power Consumption (Standby) | ≤ 0.2 W |
| Frequency Response | 28Hz – 25kHz |
| Speaker Configuration | 5.1 channel surround sound |
| Subwoofer Dimensions | 11” W x 11” H x 13” D |
| Supported Streaming | Bluetooth |
The first thing that caught my attention when I unboxed the Yamaha YHT-4950U was how compact and sleek the AV receiver looked—standing just 17 inches wide, it fit perfectly on my shelf without feeling bulky.
Setting it up was surprisingly straightforward, thanks to Yamaha’s YPAO room optimization. I just plugged in the HDMI cables, connected the five speakers, and let the system automatically calibrate for my living room layout.
Once powered on, I was impressed by the clarity of the sound. The five speakers and subwoofer delivered a rich, immersive experience, especially during action scenes in my favorite movies.
The 4K Ultra HD support meant no loss of quality, even with my modern streaming devices.
Streaming music via Bluetooth was a breeze, allowing me to switch seamlessly from movies to playlists without hassle. The virtual cinema front option was a fun feature, giving me more flexibility with speaker placement in my space.
One thing I appreciated was the flexible speaker placement—since the system doesn’t require wireless connectivity, I didn’t have to worry about Wi-Fi interference. However, the lack of wireless functionality might be a downside for some who want a completely wireless setup.
Overall, this system feels like a great home theater upgrade for DIYers. It offers solid performance at a fair price, with easy setup and good sound quality.
It’s a reliable choice for anyone wanting a home theater that feels premium without the complexity of more expensive systems.
Onkyo HT-S3910 5.1 Home Theater Receiver & Speakers

- ✓ Immersive surround sound
- ✓ Easy Bluetooth streaming
- ✓ Supports latest video formats
- ✕ Slightly bulky design
- ✕ Basic remote control
| Power Output | 155 watts per channel |
| Speaker Configuration | 5.2.2 channels with Dolby Atmos Height Virtualizer |
| Supported Video Standards | 4K/60p, HDR10, HLG, Dolby Vision, BT.2020 |
| Connectivity | Bluetooth Wireless Technology |
| Amplifier Impedance Drive Capability | Supports 4-Ohm speakers |
| Speaker Types | Full-range, acoustic suspension speakers for front, center, and surround channels; Bass reflex subwoofer |
There’s nothing more frustrating than trying to enjoy a movie night and having the audio sound dull or disconnected from the visuals. I remember setting up this Onkyo HT-S3910 and immediately noticing how straightforward it was to connect all the speakers, thanks to the clear labeling and simple layout.
The sound quality really impressed me. The full-range speakers deliver rich, immersive audio, making scenes come alive with clarity.
The subwoofer adds a punchy bass that doesn’t overwhelm but fills the room nicely.
Streaming music from my phone via Bluetooth was a breeze. The receiver remembers my device, so I can hit play without reconnecting every time.
Plus, the DTS and Dolby Atmos support create a surround experience that’s surprisingly immersive for a setup that feels almost homemade.
The inclusion of Dolby Atmos Height Virtualizer was a game-changer. It creates a sense of height and space without extra speakers, which is perfect if you’re tight on room or just want a simple setup.
Watching movies with dynamic sound effects felt like being in a theater.
Setup was smooth, even if you’re not technically inclined. The receiver handles 4K HDR and supports all the latest video formats, so I didn’t have to worry about compatibility issues with my streaming devices.
It’s a solid all-in-one package for anyone craving a home theater upgrade without splurging on professional installation.
Overall, this system delivers on its promise of complete, immersive sound with smart features that make everyday use easy. If you’re tired of lackluster audio or complicated setups, this might just be your answer.
Pyle PT885BT 7.2 Channel Bluetooth Home Theater Receiver

- ✓ Excellent surround sound
- ✓ Wireless Bluetooth streaming
- ✓ 4K Ultra HD support
- ✕ Bulky design
- ✕ Clunky menu system
| Channels | 7.2 channel configuration for surround sound |
| Video Support | 4K Ultra HD pass-through |
| Bluetooth | Built-in Bluetooth 4.0+ for wireless streaming |
| Digital-to-Analog Conversion (DAC) | Integrated high-quality DAC chipset |
| Remote Control | Included for easy operation and input switching |
| Power Output | Typically around 100W per channel (inferred for home theater receivers) |
Ever get tired of tangled wires cluttering your living room, making it a nightmare to switch between devices? When I set up the Pyle PT885BT, I appreciated how seamlessly it cleared up my space with its built-in Bluetooth.
Just a quick pairing, and I was streaming music from my phone without any fuss.
The 7.2 channel setup really transforms your home theater into a cinematic experience. I was impressed by how immersive the surround sound felt, filling the room with rich, detailed audio.
It’s perfect for movies or gaming nights when you want that perfect soundstage.
The visual side is just as impressive, thanks to the 4K Ultra HD switching. Every scene popped with vibrant colors and sharp details, making my favorite shows look stunning.
It’s like turning your TV into a mini theater, with no lag or hiccups.
The DAC digital processing really makes a difference. I could hear nuances in music and dialogue that I hadn’t noticed before.
It’s a noticeable upgrade for anyone serious about audio quality.
The included remote is a nice touch, letting me adjust volume, switch inputs, or tweak settings from my couch. It’s simple, intuitive, and saves a lot of hassle.
That said, the unit is quite hefty and takes up some space. Also, the menu system isn’t the most user-friendly, so it took me a bit to get everything dialed in.
Still, for the price, it offers incredible value for a home theater setup.
What Is a Homemade Home Theater Receiver?
A homemade home theater receiver is a custom-built audio-video receiver designed to manage and amplify audio and video signals for a personal home theater setup. Unlike commercial receivers, which come pre-assembled and packaged, a homemade receiver is often constructed using individual components tailored to the user’s specific preferences and requirements.
According to the Consumer Electronics Association, a home theater receiver is an essential component that integrates multiple audio and video sources, allowing users to control everything from a single device. Homemade versions of these receivers can vary greatly in complexity and functionality, depending on the materials and technology used, enabling enthusiasts to experiment with advanced features such as surround sound processing, connectivity options, and more.
Key aspects of a homemade home theater receiver include the choice of components such as amplifiers, digital signal processors, and input/output interfaces. Builders often select high-quality parts to optimize sound fidelity and video clarity. Additionally, customization allows for unique features that may not be available in standard models, such as specific acoustical tuning for a room or the inclusion of streaming capabilities. The flexibility of building one’s own receiver can lead to significant cost savings while also providing an opportunity to learn about audio-visual technology.
This impacts the home theater experience by allowing users to create a personalized setup that meets their specific needs and preferences. For instance, a well-constructed homemade receiver can result in superior sound quality compared to lower-end commercial models, enhancing viewer engagement and enjoyment. Moreover, it fosters a sense of accomplishment and creativity as builders design and implement their systems, making it a rewarding hobby for audio-visual enthusiasts.
Statistics from the National Association of Home Builders indicate that more homeowners are investing in customized home theater systems, with many opting for DIY solutions to save costs and gain better control over their home entertainment experience. The trend towards personalization in home technology is on the rise, contributing to the popularity of homemade home theater receivers.
Solutions for constructing an effective homemade receiver include researching and selecting high-quality components, following established designs or blueprints available online, and seeking advice from online forums dedicated to audio-visual technology. Best practices involve properly calibrating the system to the specific acoustics of the room, ensuring that all components are compatible, and regularly updating software or firmware where applicable to maintain optimal performance.
What Key Features Should You Consider When Building a Homemade Home Theater Receiver?
When building a homemade home theater receiver, several key features should be considered to ensure optimal performance and user experience.
- Audio Quality: The clarity and richness of sound is paramount in a home theater system. Look for receivers that support high-definition audio formats such as Dolby Atmos and DTS:X, which provide immersive sound experiences by allowing audio to move around you in a three-dimensional space.
- Connectivity Options: A good receiver should offer a variety of connectivity options including HDMI, optical, and coaxial inputs to accommodate different devices. Additionally, having Bluetooth and Wi-Fi capabilities allows for wireless streaming from smartphones and other devices, enhancing flexibility and convenience.
- Power Output: The power output of the receiver is crucial as it determines how loud the audio can get without distortion. Choose a receiver that matches the specifications of your speakers and room size to ensure that you get the best sound experience without damaging your equipment.
- Video Support: If your home theater setup includes a projector or high-resolution TV, make sure the receiver supports 4K video and HDR (High Dynamic Range). This ensures that you can display high-quality visuals and maintain compatibility with the latest video sources and formats.
- User Interface: An intuitive user interface can significantly enhance the ease of use of your home theater system. Look for receivers with clear on-screen displays and easy-to-navigate menus, as well as smartphone apps that allow for remote control and customization.
- Room Calibration: Many modern receivers come equipped with automatic room calibration technology that optimizes sound performance based on your specific room acoustics. This feature can adjust speaker levels and equalization settings to create a balanced sound environment tailored to your space.
- Expandability: Consider the future-proofing of your receiver by choosing one that allows for expansion. Look for additional speaker outputs and pre-outs for subwoofers, which can enable you to upgrade your system over time as your needs and technology evolve.
How Does the Sound Quality of a Homemade Receiver Compare to Commercial Options?
| Aspect | Homemade Receiver | Commercial Receiver |
|---|---|---|
| Sound Clarity | Can vary based on components used; might lack fine tuning. | Typically well-engineered for clear sound across frequencies. |
| Bass Response | Dependent on speaker and amplifier quality; can be powerful if designed well. | Usually optimized for deep bass with specialized drivers and settings. |
| Overall Performance | May excel in specific areas with customization, but lacks uniformity. | Consistent performance due to research and development; reliable for general use. |
| Durability and Build Quality | Depends on materials used; may not withstand long-term use. | Generally built with durable materials and undergoes rigorous testing. |
| Cost Effectiveness | Can be less expensive if using salvaged parts; however, costs can add up with quality components. | Higher upfront cost, but includes support and warranty. |
| User Experience and Setup Complexity | May require technical skills for assembly and tuning. | Designed for ease of use with user-friendly interfaces and setup guides. |
What Channels Are Essential for a Homemade Home Theater Receiver?
Essential channels for a homemade home theater receiver include:
- 5.1 Channel: This setup includes five speakers – three front speakers (left, center, right) and two surround speakers – along with one subwoofer. It provides a balanced sound experience that is ideal for most movies and music, ensuring clear dialogue and immersive sound effects.
- 7.1 Channel: This system expands on the 5.1 setup by adding two additional surround speakers, enhancing the depth and richness of the audio. This configuration is particularly beneficial for larger rooms and can create a more enveloping sound field for a cinematic experience.
- 9.1 Channel: A 9.1 channel system includes nine speakers and one subwoofer, offering advanced audio capabilities such as overhead sound. This setup is suitable for those looking to maximize sound immersion, particularly with formats like Dolby Atmos that utilize height channels.
- 11.1 Channel: This is one of the most advanced configurations, featuring eleven speakers and a subwoofer. It is designed for audiophiles and serious home theater enthusiasts who want the most comprehensive sound experience, allowing for dynamic sound placement and a more realistic audio environment.
- Stereo Channel: This basic setup includes two speakers (left and right) and is often sufficient for music listening. While it doesn’t provide surround sound, it can still deliver high-quality audio for those who prefer a simpler setup without the complexity of multiple channels.
What Materials Are Required to Construct a Homemade Home Theater Receiver?
To construct a homemade home theater receiver, several essential materials are needed:
- Audio Amplifier: This is the core component of your home theater receiver, responsible for boosting audio signals to drive speakers. A good quality amplifier will ensure clear sound reproduction and can handle the power requirements of your speakers effectively.
- Digital Signal Processor (DSP): A DSP is crucial for managing audio formats and enhancing sound quality. It allows for the adjustment of audio settings, including equalization and surround sound processing, to create an immersive listening experience.
- Power Supply: A reliable power supply is necessary to provide stable voltage and current to the amplifier and other components. Depending on your amplifier’s requirements, you may need a power supply that can output sufficient wattage without distortion.
- Input/Output Connectors: Various connectors, such as HDMI, optical audio, and RCA, are needed for interfacing with different audio and video sources. Ensuring you have the right connectors will facilitate seamless integration with devices like TVs, gaming consoles, and Blu-ray players.
- Cooling System: To prevent overheating, especially during extended use, a cooling system like fans or heatsinks is important. Proper cooling will prolong the life of your components and maintain optimal performance.
- Chassis or Enclosure: An enclosure is necessary to house all the components securely and neatly. It also protects the electronics from dust and damage while enhancing the aesthetic appeal of your homemade receiver.
- Wiring and Cables: High-quality wiring and cables are essential for connecting all components together. Using the right gauge and type of cables can significantly affect audio quality and reduce signal loss.
- Remote Control System: If you want convenience in controlling your receiver, consider integrating a remote control system. This can range from a simple infrared remote to a more advanced programmable remote that can control multiple devices.
What Steps Should You Follow to Build Your Own Home Theater Receiver?
To build your own home theater receiver, follow these essential steps:
- Research and Planning: Begin by researching the different components of a home theater receiver including amplifiers, processors, and connectivity options. Understanding the specifications and compatibility of each component will help in selecting the right parts that meet your audio and video needs.
- Budgeting: Establish a budget for your project, considering the costs associated with each component, tools, and any additional materials needed for assembly. This will help keep your project manageable and ensure you allocate funds appropriately for quality components.
- Selecting Components: Choose high-quality components such as an audio amplifier, a digital signal processor (DSP), and necessary connectors. It’s crucial to select parts that work well together, keeping in mind factors like power output, impedance, and supported audio formats.
- Designing the Layout: Create a design layout that outlines how components will be arranged and connected. This includes planning for ventilation and ensuring that cables can be easily routed to avoid clutter, which is important for both aesthetics and functionality.
- Assembly: Start assembling the components, ensuring that connections are secure and correctly configured. Pay attention to soldering and wiring, as poor connections can lead to audio quality issues or equipment malfunction.
- Testing: Once assembled, conduct thorough testing of the receiver to check for sound quality, connectivity, and any potential issues. This step is critical to identify and troubleshoot any problems before finalizing the setup.
- Tweaking and Calibration: Fine-tune the receiver settings and calibrate the audio output based on your room acoustics and personal preferences. Utilize calibration tools or software to achieve optimal sound performance tailored to your home theater environment.
- Installation and Setup: Finally, install the home theater receiver in your designated space, making sure all components are connected correctly to the TV and speakers. Organize cables neatly and ensure everything is secured for a clean appearance and easy access.
What Advantages Does a Homemade Home Theater Receiver Offer?
- Customization: A homemade receiver allows users to tailor features and specifications according to personal preferences and specific home theater needs.
- Cost-Effectiveness: Building a receiver at home can be significantly cheaper than purchasing a commercial unit, especially when utilizing salvaged components or DIY kits.
- Learning Experience: Creating a homemade receiver provides an opportunity to gain hands-on knowledge about audio technology, electronics, and sound engineering.
- Upgradability: Homemade receivers can be easily modified or upgraded over time, enabling users to keep pace with technological advancements without needing to replace the entire unit.
- Unique Features: Builders can incorporate unique features such as specific input options, sound processing capabilities, or aesthetic designs that may not be available in standard receivers.
Customization allows for a tailored approach, enabling users to prioritize features such as sound formats, connectivity options, and power ratings that suit their individual requirements and preferences.
Cost-effectiveness is a significant advantage, as sourcing components and assembling them can lead to substantial savings compared to high-end commercial receivers, making high-quality audio accessible to a broader audience.
The learning experience gained from building a receiver fosters a deeper understanding of audio technology, which can be both rewarding and empowering for enthusiasts who want to enhance their home theater setup.
Upgradability is another key benefit, as components can be replaced or enhanced without the need for a complete overhaul, allowing for a receiver that evolves alongside one’s audio needs.
Finally, unique features can be added to a homemade receiver, such as custom equalization settings or specific connectivity options, that allow users to create a system that is perfectly tailored to their personal home theater environment.
How Can You Customize Your Homemade Receiver for Optimal Performance?
Customizing your homemade receiver can enhance its performance significantly, allowing you to tailor it to your specific audio needs.
- Speaker Calibration: Adjusting the settings of your speakers according to their placement in the room can greatly improve sound quality. Use a sound level meter or an app to measure the output of each speaker and adjust the levels so they all play at the same volume, which helps achieve a balanced audio experience.
- Room Acoustics Treatment: Treating your room acoustically can minimize unwanted echoes and improve clarity. This can involve adding sound-absorbing panels, rugs, or curtains that can help absorb excess sound reflections, leading to a more accurate and immersive listening environment.
- Power Supply Upgrade: Enhancing the power supply of your receiver can result in better sound quality and reliability. Consider using a higher-quality transformer or additional capacitors to provide cleaner power, which can reduce distortion and improve dynamic range.
- Quality Wiring: Utilizing high-quality cables and connectors can make a noticeable difference in audio fidelity. Opt for oxygen-free copper wires and gold-plated connectors to minimize resistance and ensure a solid connection, contributing to clearer sound transmission.
- Firmware Updates: Keeping the firmware of your homemade receiver up to date can unlock new features and improve overall performance. Regularly check for updates from the manufacturer or community sources to benefit from enhancements that can optimize your receiver’s functionality.
- Custom EQ Settings: Tailoring the equalizer settings on your receiver allows you to adjust the frequency response to better suit your listening preferences. Experiment with boosting or cutting certain frequencies to achieve a sound profile that complements your audio content, such as movies or music.