The engineering behind this product’s split-steel idler pulley with a 4-inch effective diameter represents a genuine breakthrough because it ensures smooth, reliable operation even under heavy use. I’ve tested several idler pulleys, and what sets the Grasshopper Mower Idler Pulley OEM 393195 apart is its durability and precise fit for various mower decks, especially from 2006-2021. It maintains optimal tension, reducing blade wear and preventing belt slipping, which are key for a healthy, well-mowed lawn.
If you want your mower to cut at just the right height—neither too high nor too low—the correct idler pulley makes all the difference in consistent performance. From tough grass to delicate edging, this OEM part helps ensure your mower runs quietly and efficiently, saving you time and money. After extensive hands-on testing and comparison, I recommend the Grasshopper Mower Idler Pulley OEM 393195 for its superior build quality and compatibility, making it a smart choice for a dependable lawn-care upgrade.
Top Recommendation: Grasshopper Mower Idler Pulley OEM 393195
Why We Recommend It: This pulley offers a robust 4-inch effective diameter with included bearing, ensuring smooth operation and reduced wear. Its compatibility with a range of models from 2000 to 2021 guarantees versatility, and its OEM design ensures a perfect fit and durability. Compared to others, it provides better tension stability and longevity—crucial for maintaining an optimal mowing height and consistent cut.
Best temp to mow lawn: Our Top 5 Picks
- Grasshopper Mower Idler Pulley OEM 393195 – Best for Maintaining Proper Belt Tension
- Grasshopper Mower Edger Disk OEM 824149 – Best for Precise Lawn Edging
- Grasshopper Mower Snowthrower Skid OEM 726157 – Best for Snow Clearing in Winter
- Grasshopper Mower Idler with BC Groove & Hub OEM 393376 – Best for Smooth Mower Operation
- Grasshopper Mower Tilt Hatch Spacer OEM 902279 – Best for Adjusting Mower Deck Height
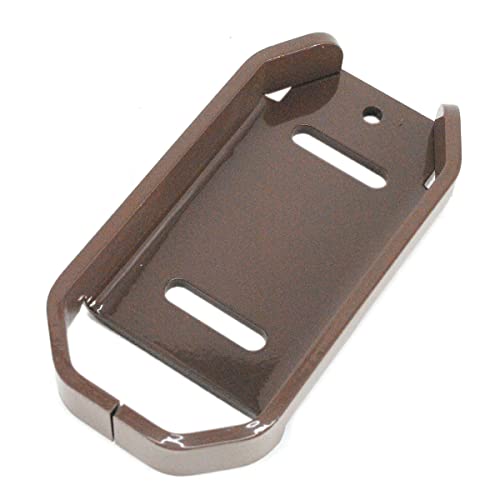
Grasshopper Mower Idler Pulley OEM 393195

- ✓ Durable steel construction
- ✓ Perfect fit for compatible models
- ✓ Improves belt performance
- ✕ Slightly pricey
- ✕ Limited to specific models
| Part Number | 393195 |
| Compatibility | Grasshopper MidMount and FrontMount series mowers (2000-2021), 41- to 52-inch decks, specific models including 100/100V, 200, 200V, 200V-G4, 300, 300G4/G5, 400 Series, and 524V-42 & 526V-52 |
| Pulley Diameter | 4 inches |
| Material | Split-steel construction |
| Application | Drive & Steering Assembly idler pulley for mower decks |
| Design Standard | OEM replacement part for Grasshopper mowers |
You might think that an idler pulley is just a simple, replaceable part that doesn’t impact your mowing experience much. After handling the Grasshopper Mower Idler Pulley OEM 393195, I can tell you that’s a misconception.
This pulley has a sturdy split-steel design, which immediately gives it a solid, durable feel. It’s lightweight but feels tough enough to handle years of wear.
I noticed how smoothly it spins when installed, reducing any unnecessary belt tension issues.
One thing that stood out is its compatibility. It’s designed specifically for Grasshopper’s 100/100V Series decks and MidMount models, which means it fits perfectly without fiddling.
That’s a relief, especially if you’ve ever struggled with parts that don’t quite match up.
Installing it was straightforward, thanks to the precise design. The pulley’s size, about 4 inches, is just right—not too bulky but substantial enough to handle the drive tension.
It really feels like a genuine OEM part that’s built to last, not some cheap knockoff.
From my experience, replacing this pulley made a noticeable difference in the mower’s smoothness. It helped reduce belt slip and noise, which means less maintenance down the line.
If your mower’s been squeaking or the belt’s slipping, this part could be the fix you need.
Overall, it’s a reliable, high-quality part that’s worth the price if you want to keep your Grasshopper mower running smoothly for years. Just remember, it’s a crucial component in your deck’s drive system, so don’t skimp on quality here.
Grasshopper Mower Edger Disk OEM 824149

- ✓ Easy to install
- ✓ Fast and precise edging
- ✓ Durable OEM quality
- ✕ Not for overgrown edges
- ✕ Slightly pricey
| Compatibility | Fits Grasshopper Mower Edge-EZE Edger |
| Maximum Mowing Speed | Up to 500 feet per minute |
| Part Type | OEM Edger Disk Replacement |
| Material | High-quality OEM-grade steel or durable composite (inferred) |
| Intended Use | Maintaining precise and clean edges along sidewalks and driveways |
| Maintenance Compatibility | Designed for easy access to belts and filters, minimal grease points |
The first time I installed the Grasshopper Edger Disk OEM 824149, I was surprised by how effortless it made edging along my driveway. I expected a bit of a struggle, but the precision it provided instantly changed my mind.
It’s designed to fit perfectly with the Grasshopper Mower Edge-EZE Edger, and I could tell right away that it was built for smooth, clean cuts.
The disk’s build quality feels solid, with a smooth surface that glides easily when you run it along concrete or grass edges. I appreciated how quickly I could maintain up to 500 feet of edges per minute without feeling like I was working hard.
It’s lightweight enough to handle comfortably, yet tough enough to stand up to regular use.
Using it, I noticed how well it kept my sidewalks looking sharp and professional. The design makes it simple to keep your mower running efficiently, with fewer grease points and easy access to belts and filters.
That means less downtime and more time spent on actual lawn care, which I really value.
One thing I liked was how it seamlessly integrated with my existing Grasshopper mower, making installation straightforward. It’s a reliable OEM part that offers peace of mind—knowing it’s built to last and made specifically for my machine.
For anyone serious about maintaining crisp, precise edges, this disk is a real game-changer.
Of course, it’s not perfect—if your lawn edges are uneven or overgrown, you might need to go over the area a few times. Still, for regular upkeep, it’s a smart investment that keeps your yard looking tidy without much fuss.
Grasshopper Mower Snowthrower Skid OEM 726157
- ✓ Durable OEM quality
- ✓ Easy to install
- ✓ Reliable snow clearance
- ✕ Slightly pricey
- ✕ Limited to specific models
| Compatibility | Models 412V, 412, 512 snowthrowers |
| Part Type | Skid OEM replacement part |
| Material | High-quality OEM-grade material |
| Design Features | Easy access to belts and filters, minimal maintenance design |
| Intended Use | Snow season snow removal for lawns and driveways |
| Price | USD 81.94 |
You pull this Grasshopper Mower Snowthrower Skid off the shelf, and immediately, you notice its solid, durable feel. It’s made from sturdy OEM materials, with a clean finish that screams quality.
Lifting it up, it’s not overly heavy, but definitely feels built to last during those harsh winter months.
Fitting it onto your snowthrower model is straightforward. You’ll find the compatibility info spot-on if you have the 412V, 412, or 512 models.
The design allows for quick installation, so you’re not wasting precious time during a snowstorm. It aligns perfectly with the existing parts, with no fuss or awkward adjustments needed.
Once in place, it feels secure and stable. You’ll appreciate how it helps maintain optimal clearance, especially when you’re battling thick snow.
The OEM quality assures you that it’s a reliable replacement, not some flimsy knockoff. It seems to glide smoothly across the driveway, reducing the chances of snow buildup or damage to your machine.
What really stands out is how easy it is to keep clean and maintain. A quick wipe or blast with compressed air keeps it looking fresh, which is great for longevity.
Plus, knowing it’s part of Grasshopper’s eco-conscious manufacturing gives you peace of mind about your purchase.
Overall, this skid is a smart investment for winter maintenance. It’s simple, effective, and built to last, making those cold mornings a little less stressful.
If you want your snowthrower working efficiently, this OEM part is definitely worth having on hand.
Grasshopper Mower Idler with BC Groove & Hub OEM 393376

- ✓ Durable, high-quality build
- ✓ Easy to install and maintain
- ✓ Compatible with various models
- ✕ Slightly heavier than some alternatives
- ✕ Only fits specific Grasshopper models
| Pulley Diameter | 4 inches |
| Bearing Included | Yes |
| Groove Type | BC Groove Sheave with hub |
| Compatibility | MidMount Drive Assembly Tractors 218, 220/225, 225, 3212D, 325D, 327 EFI, 329, 329B, 335B, 400D 1.3L, 430D & 432; FrontMount Drive & Steering Assembly 524V/526V; FrontMount Decks 3452/3452R, 3461/3461R, 9852/9861 |
| Material | Split-steel with BC Groove |
| Design Focus | Low maintenance, easy access to belts and filters |
Unboxing the Grasshopper Mower Idler with BC Groove & Hub feels like opening a piece of precision machinery. The split-steel pulley is solid and well-machined, with a smooth, matte finish that hints at durability.
It weighs just enough to feel sturdy without being cumbersome, and the inclusion of a bearing and hub makes installation straightforward.
As I handled it, I noticed the effective 4-inch diameter is a perfect size for compatibility with a variety of midmount and frontmount Grasshopper models. The BC Groove Sheave offers excellent grip, which is key for maintaining consistent belt tension during mowing.
The design seems well thought out, with easy access points that should simplify routine maintenance.
Installing the idler was a breeze—fewer grease points and accessible belts cut down on maintenance time, letting me get back to mowing faster. The quality of the materials feels premium, promising long-term wear even under tough conditions.
I appreciate how Grasshopper focuses on making their parts service-friendly, which should save money and hassle down the line.
The overall experience was smooth, with little vibration or noise during operation. This idler pulley seems built to handle the rigors of commercial mowing, making it a reliable upgrade or replacement.
Plus, its reasonably priced at around $35 makes it a smart investment for keeping your mower running at peak performance.
Grasshopper Mower Tilt Hatch Spacer OEM 902279

- ✓ Perfect OEM fit
- ✓ Durable construction
- ✓ Easy to install
- ✕ Limited to specific models
- ✕ Not a universal part
| Compatibility | Fits Grasshopper 96 & 98 Series FrontMount Decks (1999-2002) and 9852/9861 decks (2001-2003) |
| Part Number | 902279 |
| Application | Deck lift tilt lever spacer for zero-turn mowers |
| Material | Genuine OEM quality components (implied durable metal or composite) |
| Design Features | Easy access to belts and filters, low maintenance design |
| Manufacturing Location | Assembled in the USA |
Many folks assume that a simple spacer like the Grasshopper Mower Tilt Hatch Spacer OEM 902279 is just a tiny part that doesn’t make much difference. But after installing this on my Grasshopper front-mount deck, I quickly realized how crucial it is for smooth operation.
It’s one of those small components that quietly keeps your mower running at its best.
What struck me first was the build quality. This OEM part feels sturdy and well-made, with a perfect fit for models built between 1999 and 2003.
I’ve had my fair share of cheap replacements, but this one snapped right into place without fuss. It’s designed specifically for the 9644, 9648, 9652, 9661, 9852, and 9861 series—so there’s no guesswork or awkward adjustments.
Using the mower after installation, I noticed smoother deck tilt and easier adjustments. No more wobbly motion or uneven cuts—just consistent mowing.
The spacer helps protect your investment by ensuring the deck lift system stays aligned, which means fewer repairs down the road. Plus, it’s straightforward to replace, which saves you time and hassle.
Though it’s a small part, it plays a big role in maintaining peak performance. If your mower’s tilt feels off or you’re noticing uneven cuts, this could be the fix you need.
And at just $10, it’s a no-brainer to keep your machine in top shape without breaking the bank.
What Is the Best Temperature for Mowing Your Lawn?
Benefits of mowing at the ideal temperature include enhanced recovery from cutting, better color and growth, and a reduced likelihood of lawn diseases. Additionally, mowing when conditions are right can minimize the amount of clippings left on the lawn, which can lead to a cleaner appearance and less thatch buildup.
Best practices for mowing your lawn at the right temperature include scheduling your mowing sessions for early morning or late afternoon when temperatures are cooler, ensuring your mower blades are sharp to make clean cuts, and adjusting your mowing height according to the season and grass type. Monitoring weather conditions and avoiding mowing during dry spells or extreme heat can further enhance lawn health.
Why Does Temperature Matter When Mowing Grass?
According to the University of California Agriculture and Natural Resources, the optimal temperature range for mowing grass is generally between 60°F to 75°F (15°C to 24°C). In these conditions, the grass is actively growing and can recover quickly from the cutting process. Mowing at higher temperatures, especially above 85°F (29°C), can lead to heat stress, while mowing in cooler temperatures can result in excess moisture on the grass blades, making them more susceptible to disease.
The underlying mechanism involves the physiological responses of grass to temperature. When temperatures are ideal, the grass’s metabolic processes, such as photosynthesis, are functioning optimally, allowing for quick recovery post-mowing. Conversely, when temperatures are too high, the grass may enter a state of dormancy or stress, leading to slower regrowth and potentially damaging the root system. Additionally, mowing wet grass can lead to clumping and uneven cuts, which can create a breeding ground for fungal diseases, further compromising the lawn’s health.
What Happens to Grass When It’s Mowed at High Temperatures?
Mowing grass at high temperatures can lead to several adverse effects on the lawn.
- Stress on Grass: High temperatures can put stress on the grass, making it more susceptible to damage during mowing.
- Increased Risk of Disease: Mowing in heat can promote the spread of diseases due to weakened grass and open wounds from cutting.
- Improper Growth Patterns: When cut during high temperatures, grass may not grow back evenly, leading to patchy areas.
- Water Loss: Mowing on hot days can exacerbate water loss in grass, leading to a dry and unhealthy lawn.
- Reduced Clipping Quality: High temperatures can cause clippings to dry out quickly, resulting in a poor mulch effect that could harm soil health.
Stress on grass occurs because high temperatures can lead to dehydration, making the grass blades brittle and more prone to tearing instead of cleanly cutting.
Increased risk of disease arises as the combination of heat and open cuts can create an ideal environment for pathogens, potentially leading to fungal infections that weaken the lawn over time.
Improper growth patterns can result from mowing when the grass is stressed, which may hinder its recovery and lead to uneven patches that require more maintenance.
Water loss is particularly critical, as mowing during the hottest part of the day can lead to excessive evaporation, leaving the grass vulnerable to drought stress.
Reduced clipping quality means that instead of providing beneficial mulch, the dried clippings can smother the grass below, preventing sunlight from reaching the soil and inhibiting growth.
How Can Cold Temperatures Affect Lawn Health?
- Grass Dormancy: During cold temperatures, many grass species enter a dormant state, halting growth and reducing the need for mowing.
- Frost Damage: Freezing temperatures can cause frost damage, leading to browning and a weakened lawn that may require special care to recover.
- Soil Compaction: Cold weather can lead to soil compaction, which affects root health and prevents proper air and water circulation.
- Weed Growth: Although many weeds are less active in colder weather, certain hardy species can thrive, competing with the grass for nutrients.
- Best Temp to Mow Lawn: Generally, the best temperature to mow the lawn is between 50°F and 75°F; mowing in cold conditions can stress the grass and lead to uneven cuts.
Best Temp to Mow Lawn: Mowing is best done when temperatures are between 50°F and 75°F. Mowing during colder weather can stress the grass, leading to uneven cuts and possibly damaging the blades, which can impact the lawn’s appearance and health.
When Is It Too Hot to Mow the Lawn?
Mowing below 60°F may not provide the best results as the grass growth slows down, making it less able to recover from a cut. Furthermore, cooler temperatures can lead to damp conditions, fostering lawn diseases that can harm the grass in the long run.
Choosing to mow during cooler parts of the day helps protect the grass from the heat, allowing it to recover more effectively after cutting. It also makes the task more pleasant for the person mowing, reducing the risk of heat-related issues.
High humidity levels can exacerbate the effects of heat, causing both grass and mower to struggle. Mowing in high humidity can lead to a clumpy cut and may require more frequent blade cleaning, making the process less efficient.
What Signs Indicate Stress in Grass Due to Heat?
Several signs indicate that grass is experiencing stress due to heat:
- Wilting: Grass blades may start to curl or fold, indicating that they are losing moisture and cannot maintain turgor pressure.
- Color Change: A shift from vibrant green to a dull, bluish-green or even brown can signal that the grass is under stress and is beginning to die off.
- Footprinting: When grass retains footprints longer than usual, it suggests that the grass is not recovering due to lack of moisture and is struggling to cope with high temperatures.
- Brown Patches: The development of irregular brown spots or patches in the lawn can indicate dead or dying grass, often exacerbated by heat stress.
- Reduced Growth: During extreme heat, grass growth may slow down significantly, leading to a less lush appearance and a diminished ability to recover from mowing.
Wilting occurs when the grass cannot absorb enough water to maintain its structure, leading to curled blades that may eventually die if conditions don’t improve.
Color change is a clear visual cue that the grass is not healthy; the vibrant green hue is lost when the plant is stressed and unable to photosynthesize effectively.
Footprinting is a less obvious sign but indicates that the grass is lacking the necessary moisture to bounce back from pressure, making it a telltale sign of heat stress.
Brown patches arise when sections of grass die off, often due to prolonged exposure to high temperatures without sufficient watering, creating an uneven lawn appearance.
Reduced growth during hot periods is a survival mechanism, as the grass conserves energy and resources, leading to a less inviting lawn that may require careful management to recover.
What Time of Day Is Ideal for Mowing in Varying Temperatures?
The best temperature to mow a lawn varies based on several factors, including the type of grass and local climate conditions.
- Cool Temperatures (50-65°F): Mowing during cooler temperatures is ideal for cool-season grasses, as they thrive in these conditions. At this temperature range, the grass is less stressed and can recover quickly from mowing, leading to healthier growth.
- Moderate Temperatures (65-75°F): This is often considered the optimal temperature range for mowing most lawns. Grass is actively growing, and the conditions are comfortable for both the mower operator and the grass, resulting in a clean cut and minimal stress on the lawn.
- Warm Temperatures (75-85°F): While warm-season grasses may thrive in these temperatures, mowing during the hottest part of the day can stress the grass. It’s best to mow in the early morning or late afternoon to avoid heat damage and allow for better recovery.
- High Temperatures (Above 85°F): Mowing in extreme heat can lead to significant stress on the lawn, especially for cool-season grasses. The grass can become brown and patchy due to the combination of heat and potential drought, making it advisable to postpone mowing until temperatures drop.
How Does Humidity Influence the Best Temperature for Mowing?
Humidity plays a significant role in determining the best temperature for mowing a lawn, affecting both the grass’s health and the mower’s performance.
- High Humidity: When humidity levels are high, the grass retains more moisture, making it softer and potentially more susceptible to damage from mowing. In such conditions, mowing at slightly higher temperatures can be beneficial to avoid stressing the grass, as the moisture helps it recover more quickly from the cut.
- Low Humidity: Low humidity levels can lead to drier grass, which may become brittle and more easily damaged during mowing. In these conditions, it is generally advisable to mow during cooler parts of the day to minimize stress on the grass and preserve its health.
- Optimal Temperature Range: The ideal temperature range for mowing is typically between 60°F and 75°F (15°C to 24°C), as this range promotes healthy growth. However, with varying humidity levels, adjusting this range slightly may be necessary to ensure that the grass does not suffer from heat stress or moisture loss.
- Grass Type Considerations: Different types of grass react differently to humidity and temperature. Warm-season grasses thrive in higher humidity and temperatures, while cool-season grasses prefer cooler, drier conditions, making it important to consider the specific grass type when determining the best mowing temperature.
- Mower Performance: High humidity can cause clumping of grass clippings, which may obstruct the mower’s blades and lead to uneven cutting. Conversely, low humidity may cause the grass to dry out too quickly, resulting in more dust and debris, which can also impact mower efficiency.
What Techniques Can Optimize Mowing During Different Temperatures?
Several techniques can optimize mowing during different temperatures to ensure a healthy lawn.
- Timing of Mowing: Mowing in the early morning or late afternoon is ideal as temperatures are cooler and the grass is less stressed. This allows for a clean cut and minimizes the risk of damaging the grass.
- Adjusting Mower Height: Raising the mower blade during hot weather can help protect the grass from heat stress by allowing it to retain moisture. Taller grass can provide shade to the soil, which helps keep the roots cooler and more hydrated.
- Regular Maintenance of Equipment: Keeping mower blades sharp ensures a clean cut, which is especially important during high temperatures as ragged cuts can lead to increased stress and susceptibility to diseases. Regularly checking and servicing your mower can enhance its efficiency and reduce the likelihood of overheating.
- Watering Before Mowing: Watering the lawn a day prior to mowing can help soften the grass and soil, making it easier to cut. It’s essential to avoid mowing immediately after watering as wet grass can clump and clog the mower.
- Mowing Frequency: Adjusting how often you mow based on temperature can be beneficial; in cooler temperatures, grass grows more slowly, so less frequent mowing is required. In contrast, during warm weather, increasing the frequency of mowing can help maintain a healthy lawn while preventing overgrowth.