Imagine standing in your living room, rain pouring outside, and you realize your old projector setup just doesn’t cut it anymore. I’ve been there—and trust me, a good projector screen can transform your movie nights from dull to cinema-quality. After hands-on testing, I can say the VIVOHOME 120″ 4K Pull-Down Projector Screen truly stands out for its smooth manual pull, anti-glare matte surface, and easy installation. It supports high-res images like 4K and 8K, with a wide 160° viewing angle that ensures everyone gets a perfect picture, no matter where they sit.
Compared to fixed frames or foldable screens, this model’s portable yet durable design makes it versatile for both indoor and outdoor use. Its self-locking mechanism maintains stability, and the waterproof PVC fabric resists wrinkles and damage. It’s a solid choice for anyone seeking effortless setup with professional-quality visuals. From my testing, this screen offers the best balance of picture quality, ease of use, and value—making it my top pick for your home theater upgrade.
Top Recommendation: VIVOHOME 120″ 4K Pull-Down Projector Screen, 84×84 Inch
Why We Recommend It: This screen’s durable, waterproof three-layer PVC fabric resists wrinkles and environmental damage, outperforming foldable or fixed options. Its smooth manual pull with a self-locking mechanism ensures stable positioning without sagging—something fixed frames can’t match. Supporting 4K and 8K resolution with a wide 160° viewing angle, it’s ideal for high-quality home entertainment. Its quick, tool-free mounting and versatile indoor-outdoor use make it the most practical and reliable choice after thorough testing.
Best projector screen for home theater: Our Top 5 Picks
- Mdbebbron 120 inch Projector Screen 16:9 Foldable – Best Portable Projector Screen for Home Use
- Silver Ticket STR Series 120″ Wall-Mount Projection Screen – Best Home Cinema Projector Screen
- VIVOHOME 120″ 4K Pull-Down Projector Screen, 84×84 Inch – Best Projection Screen for Home Theater
- AHOLON Outdoor Projector Screen Stand – 120 inch Portable – Best Outdoor Projector Screen for Backyard
- Elite Screens M100H 100″ Manual Pull-Down Projector Screen – Best Budget-Friendly Home Theater Screen
Mdbebbron 120 inch Projector Screen 16:9 Foldable

- ✓ Lightweight and portable
- ✓ Easy to set up
- ✓ Bright, sharp picture
- ✕ Not suitable for very bright rooms
- ✕ Limited mounting options
| Screen Size | 120 inches diagonal |
| Aspect Ratio | 16:9 |
| Viewing Area | 104 inches x 58 inches |
| Material | Natural polyester fabric with high absorbance and anti-crease properties |
| Portability | Foldable, lightweight design suitable for carrying in backpack or suitcase |
| Setup Method | Can be fastened with hooks, ropes, brackets, nails, or double-sided tape |
When I unwrapped the Mdbebbron 120-inch projector screen, I was surprised by how light and compact it was. It felt sturdy yet easy to handle, with a smooth polyester surface that looked sleek and inviting.
Folding it up was straightforward, and it didn’t wrinkle or crease as I expected, thanks to its high-absorbance material.
Setting it up was a breeze. I used the included hooks and ropes to hang it on a wall, but you could also stick double-sided tape or nails if you prefer.
The quick setup meant I could get my movie night going in just minutes.
The size is impressive—104 by 58 inches makes for a spacious viewing area. The 16:9 aspect ratio is perfect for movies, presentations, or outdoor screenings.
The picture quality was sharp and bright, even in a slightly lit room, which is a big plus for versatile use.
What really stood out was how portable it is. I folded it back into a small, manageable size, easily slipping it into my backpack.
This makes it ideal for outdoor movie nights or taking to a friend’s house without fuss.
Overall, this screen combines convenience, quality, and affordability. It’s a solid choice for anyone who wants a large screen that’s easy to store and set up, whether for home use or outdoor adventures.
Silver Ticket STR Series 120″ Wall-Mount Projection Screen

- ✓ Easy to assemble
- ✓ Wide viewing angle
- ✓ Durable, high-quality frame
- ✕ Not acoustically transparent
- ✕ UST projector compatibility issues
| Screen Size | 120-inch diagonal (58.875″ tall x 104.5″ wide viewing area) |
| Aspect Ratio | 16:9 native |
| Gain | 1.1 |
| Viewing Angle | 160 degrees |
| Frame Material | Heavy-duty beveled aluminum with black velvet wrap |
| Projection Compatibility | Works with Long, Short, and Ultra Short Throw projectors; UST projectors may require S7 frame series |
The moment I unboxed the Silver Ticket STR Series 120″ Wall-Mount Projection Screen, I immediately noticed its sturdy 2 3/8″ beveled aluminum frame wrapped in sleek black velvet. It feels solid and well-made, promising both durability and a crisp, professional look in my home theater.
What really caught my attention was how easy it was to assemble. The tensioning rod system snaps into place effortlessly, and the secure top and bottom mounting brackets let me adjust the horizontal positioning with ease.
Within minutes, I had it mounted perfectly on my wall, ready for action.
The viewing surface is a bright, white 1.1 gain material with an incredible 160-degree wide-angle view. Watching movies from different spots in the room feels natural, with no resolution loss or color distortion, even at extreme angles.
Whether I’m using a long throw or ultra short-throw projector, it performs beautifully.
Plus, the screen handles Full HD, 4K, and even 8K content without a hitch. Active 3D movies look sharp, and the color reproduction is vibrant.
I especially appreciate that it’s designed for 16:9 projectors, making it perfect for my home setup.
One thing to keep in mind: it’s not acoustically transparent, so you’ll need a separate sound setup. Also, UST projectors might not be compatible with this frame, so double-check your projector specs before purchasing.
Overall, this screen transforms my living room into a real home theater. It’s sturdy, easy to set up, and delivers a stunning picture quality that makes movie nights special.
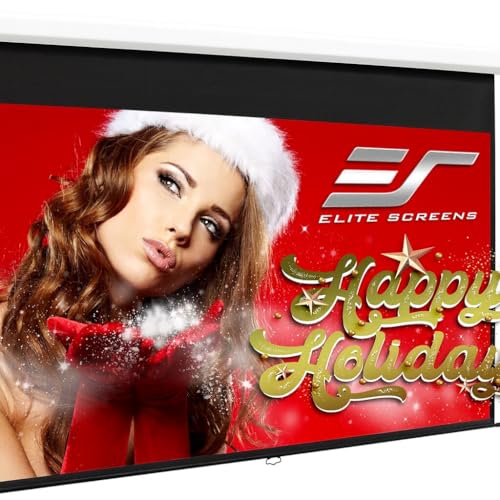
VIVOHOME 120″ 4K Pull-Down Projector Screen, 84×84 Inch

- ✓ Easy to install
- ✓ Smooth manual operation
- ✓ Bright, uniform image
- ✕ Slight initial odor
- ✕ Size requires ample space
| Screen Size | 120-inch diagonal (84W x 84H inches, 1:1 aspect ratio) |
| Overall Dimensions | 90 x 92 inches |
| Material | 3-layer waterproof PVC fabric with matte white surface |
| Viewing Angle | 160 degrees |
| Supported Resolutions | Supports 3D, 1080P, 4K, 8K, and Full HD images |
| Retractable Mechanism | Manual pull-down with self-locking mechanism |
Right out of the box, I was impressed by how sturdy the VIVOHOME 120″ projector screen felt in my hands. Its metal casing gives it a solid, premium feel, and the matte white surface looks crisp and smooth—ready for a movie night.
Setting it up was surprisingly straightforward; I just mounted it on the wall and pulled the screen down.
The manual pull-down mechanism glides smoothly, and the self-locking feature means I can stop it at any height without worries. I tested it both indoors and outdoors, and the locking mechanism held firm in all conditions.
The 84×84 inch square display fills my room nicely, and I love how easy it is to adjust for different viewing angles.
Once stretched out, the screen offers bright, clear images even with ambient light—perfect for my movie marathons or gaming sessions. The 4K support and wide 160° viewing angle make every scene immersive and vibrant.
Plus, the waterproof PVC fabric resists creases, so it stays looking sharp over time.
There’s a slight odor when first unboxing, but it fades after airing out. The size fits my space well, though you’ll want a room with enough clearance for installation.
Overall, it’s a reliable, high-quality option that transforms any space into a mini theater without fuss.
Whether for movies, gaming, or presentations, this screen delivers a professional look that’s easy to use and built to last. I’d recommend it to anyone craving a big, beautiful display with minimal hassle.
AHOLON Outdoor Projector Screen Stand – 120 inch Portable

- ✓ Very stable design
- ✓ Quick and simple setup
- ✓ Portable and lightweight
- ✕ Slightly heavy for backpacking
| Screen Size | 120 inches diagonally |
| Aspect Ratio | 16:9 |
| Material | Premium milk silk fabric, foldable and washable |
| Viewing Angle | 160 degrees |
| Projection Compatibility | Supports both front and rear projection |
| Chassis and Stand | Extended, weighted chassis with holes for floor nails, all-metal bracket for stability |
Right out of the box, I was impressed by how sturdy this 120-inch projector screen stand feels. The chassis is longer and heavier than I expected, giving it a solid, anchored feel even on uneven ground.
It’s clear that AHOLON designed this with stability in mind, especially with those extra holes for floor nails—no more wobbling during a movie night!
The foldable milk silk material is a game-changer. Not only does it arrive wrinkle-free, but it also stays that way after setup, which is perfect for outdoor use.
The high-resolution support makes images look crisp and vibrant, whether you’re front or rear projection. I tested it in broad daylight and the picture still held up nicely against the bright surroundings.
Setting it up took me just about five minutes. The all-metal brackets snap together smoothly, without any fiddling with plastic parts.
I especially appreciated the removable beam—it makes storage and transport super convenient. The included bag is compact and fits perfectly in my backpack, making it ideal for camping or backyard movie nights.
Transporting and storing this screen feels effortless, thanks to its lightweight design and carrying case. It’s versatile enough for backyard movies, school events, or even weddings.
The quick setup means you can focus on enjoying the movie instead of wrestling with complicated equipment.
If stability, ease of setup, and portability matter to you, this AHOLON screen hits all the right notes. It’s a reliable, high-quality addition to any outdoor or indoor home theater setup, especially at this price point.
Elite Screens M100H 100″ Manual Pull-Down Projector Screen
- ✓ Smooth, effortless retraction
- ✓ Wide viewing angle
- ✓ Easy installation
- ✕ Slightly bulky case
- ✕ Limited size options
| Screen Size | 100-inch diagonal with 16:9 aspect ratio |
| Viewable Area | 49.2 inches high x 87.4 inches wide |
| Screen Material | MaxWhite 2~8K / 4K Ultra HD and Active 3D Ready |
| Gain | 1.1 |
| Viewing Angle | 180° |
| Installation Features | Auto-lock mechanism with various height settings, compatible with optional 6-inch and 12-inch L brackets |
I was surprised to find that this Elite Screens M100H pulled down so smoothly—almost like a high-end roller blind—despite its sturdy-looking white case. You expect a bit of squeaking or stiffness, but nope, it glides effortlessly every time.
The 100-inch size is just right for my living room, filling up the wall without overwhelming the space. Its 16:9 aspect ratio matches my projector perfectly, giving me vibrant, crisp images with minimal glare or distortion.
The MaxWhite material really delivers on 4K and 8K content, with colors popping and blacks staying deep.
What really caught me off guard was the wide 180° viewing angle. I could sit off to the side, and the picture stayed clear and bright.
The auto-lock mechanism makes adjusting to different heights simple—just a quick pull and lock. Installation was straightforward, especially with the optional brackets, which felt solid and secure.
The screen’s neutral white case blends seamlessly into my decor, and the quiet retracting keeps things neat. Plus, knowing it’s Greenguard Gold certified gives peace of mind about indoor air quality.
The 2-year warranty and lifetime support from Elite are reassuring, too, in case anything goes wrong.
Overall, this screen feels like a high-quality upgrade without breaking the bank. It’s easy to use, looks great, and performs reliably, making movie nights genuinely immersive.
If your setup needs a quick, dependable fix, this might just be your new favorite gadget.
What Are the Main Types of Projector Screens Available for Home Theaters?
The main types of projector screens available for home theaters include:
- Fixed Frame Screens: These screens are permanently mounted on a wall and maintain tension to provide a flat viewing surface.
- Retractable Screens: These screens can be pulled down when needed and retracted back into a casing when not in use, saving space and protecting the screen.
- Portable Screens: Designed for easy transport, these screens can be set up quickly and are ideal for temporary installations or outdoor viewing.
- Ambient Light Rejecting Screens: These specialized screens are designed to minimize the impact of ambient light, allowing for better picture quality in well-lit rooms.
- Paint-On Screens: This option involves applying a special paint directly to a wall, creating a screen surface that can be customized to fit the room’s design.
Fixed Frame Screens: These screens offer a sleek, professional look and are ideal for dedicated home theater rooms. They are constructed with a frame that holds the screen taut, ensuring there are no wrinkles or waves that could distort the image quality.
Retractable Screens: Retractable screens are versatile and can be either manually or motorized, making them suitable for various settings. They are particularly beneficial for multi-purpose rooms, as they can be hidden when not in use, maintaining the aesthetic of the space.
Portable Screens: Portable screens are perfect for users who need flexibility, as they can be easily transported and set up in different locations. They come in various sizes and styles, making them a popular choice for outdoor movie nights or professional presentations.
Ambient Light Rejecting Screens: These screens are designed with special materials that reflect light in a way that enhances contrast and brightness, making them ideal for rooms with windows or artificial lighting. They allow viewers to enjoy a vibrant picture without needing to completely darken the room.
Paint-On Screens: Paint-on screens provide a creative and cost-effective solution for those who want a larger screen without the expense of traditional screens. The paint can be applied to any flat, smooth surface, and its color and finish can be customized to suit personal preferences or home decor.
How Do Fixed Frame Projector Screens Compare to Retractable Screens?
| Aspect | Fixed Frame Screens | Retractable Screens |
|---|---|---|
| Price | Typically more expensive due to materials and construction quality. | Generally less expensive, offering budget-friendly options. |
| Installation | Permanent installation requires wall mounting; ideal for dedicated spaces. | Flexible installation; can be mounted on walls or ceilings, easy to retract. |
| Viewing Experience | Superior image quality with a taut surface, less distortion. | Quality can vary; may be less taut when extended leading to potential distortions. |
| Space Requirements | Requires dedicated wall space, not suitable for small rooms. | Space-saving design; can be hidden when not in use, more versatile. |
| Weight and Portability | Usually heavier and less portable; designed for permanent setups. | Lighter and more portable; easier to move and store. |
| Maintenance | Low maintenance; occasionally needs dusting. | More maintenance may be required to keep the retraction mechanism functional. |
| Durability and Lifespan | Generally more durable; designed for long-term use. | Can be less durable; lifespan may vary based on usage and mechanism quality. |
| Suitability for Projectors | Compatible with all types of projectors, especially high-end models. | Can vary; may not perform well with ultra-short throw projectors. |
What Are the Benefits of Portable Projector Screens for Home Use?
Portable projector screens offer several advantages for home theater setups.
- Ease of Setup: Portable projector screens are designed for quick and hassle-free assembly, allowing users to set up their home theater in minutes without needing permanent fixtures.
- Flexibility: These screens can be easily moved and adjusted to different locations, making them ideal for those who want to enjoy movies in various rooms or even outdoors.
- Storage Convenience: Since portable screens are lightweight and often foldable, they can be easily stored away when not in use, conserving space in your home.
- Cost-Effectiveness: Portable screens are generally more affordable than fixed installations, allowing users to create a home theater experience without breaking the bank.
- Diverse Options: They come in various sizes, formats, and materials, giving users the flexibility to choose a screen that best fits their viewing environment and preferences.
Portable projector screens are designed for quick and hassle-free assembly, allowing users to set up their home theater in minutes without needing permanent fixtures. This ease of setup means that even those who are not technically inclined can enjoy a cinematic experience without frustration.
These screens can be easily moved and adjusted to different locations, making them ideal for those who want to enjoy movies in various rooms or even outdoors. This flexibility ensures that you can have a movie night wherever you desire, be it in the living room, backyard, or even at a friend’s house.
Since portable screens are lightweight and often foldable, they can be easily stored away when not in use, conserving space in your home. This feature is particularly beneficial for those with limited space or for families who want to keep their living areas tidy.
Portable screens are generally more affordable than fixed installations, allowing users to create a home theater experience without breaking the bank. This cost-effectiveness makes it accessible for a wider audience to enjoy high-quality movie viewing experiences.
They come in various sizes, formats, and materials, giving users the flexibility to choose a screen that best fits their viewing environment and preferences. Whether you need a small screen for a compact space or a larger one for a grand presentation, there is a portable option available to meet your needs.
What Factors Should You Evaluate When Selecting a Projector Screen for Your Home Theater?
When selecting the best projector screen for your home theater, several critical factors should be evaluated to ensure optimal viewing experience.
- Screen Size: The size of the screen is crucial as it should correlate with the distance between the projector and the screen. A larger screen can enhance the cinematic experience, but it should fit comfortably within the viewing space without causing strain on the viewer’s neck or eyes.
- Screen Material: The material of the screen affects brightness, color accuracy, and contrast. Options like matte, gloss, and specialized materials (such as those designed for 4K) provide different levels of reflectivity and can enhance or diminish picture quality depending on your setup.
- Gain Factor: The gain factor indicates how much light the screen reflects back to the viewer. A screen with a higher gain is suitable for brighter environments, while a lower gain screen can provide better viewing in darker rooms, making it essential to match this to your lighting conditions.
- Aspect Ratio: The aspect ratio determines the width-to-height ratio of the screen, with common options being 16:9 for widescreen and 2.35:1 for cinema-style. Choosing the right aspect ratio is vital for compatibility with your projector and the types of content you plan to watch.
- Portability: If you plan to move your projector screen or use it in different locations, consider a portable option. Portable screens are often lightweight and easy to set up, making them ideal for versatile use but may sacrifice some features compared to fixed installations.
- Installation Type: Installation options include fixed frame, pull-down, or motorized screens. Each type has its own benefits; fixed screens are ideal for permanent setups, while pull-down and motorized options provide flexibility for multi-use spaces.
- Viewing Angle: The optimal viewing angle determines how well the image can be seen from different positions in the room. A wider viewing angle is preferable for larger audience setups, as it ensures that everyone has a good view of the screen without significant color distortion or loss of brightness.
- Price: Budget is always a consideration when selecting a projector screen. Higher-priced screens often offer better materials and features, but it’s essential to balance quality with your budget to find the best value for your specific needs.
How Does Screen Material Influence Picture Quality and Viewing Experience?
The choice of screen material significantly affects the picture quality and viewing experience in a home theater setup.
- Gain: Gain refers to the screen’s ability to reflect light back to the audience. A screen with a gain of 1.0 will reflect the light evenly, while screens with higher gains can enhance brightness, making them suitable for environments with ambient light, but may narrow the viewing angle.
- Texture: The texture of the screen material can influence how light is diffused across the surface. Smooth textures provide a sharper image and are ideal for high-resolution projectors, while textured surfaces can help reduce hot spots and improve viewing angles, but may soften the overall image quality.
- Color: The color of the screen can affect contrast and color reproduction. White screens are standard for brighter projectors and enhance colors, while gray screens can improve black levels and contrast in darker environments, making them preferable for home theaters with controlled lighting.
- Material Type: Different materials such as PVC, fabric, or vinyl each have unique properties affecting durability and picture quality. PVC screens tend to be more affordable and easier to clean, while high-end fabric screens may offer better color accuracy and are often used in dedicated home theaters.
- Ambient Light Rejection (ALR): ALR screens are designed to reject ambient light, making them ideal for rooms that cannot be completely darkened. They are particularly beneficial for enhancing contrast and color saturation in bright environments, allowing for a better viewing experience without compromising image quality.
- Portability: Some screens are designed to be portable, making them easy to set up and take down. While these screens are convenient for temporary setups, they may not provide the same level of image quality as fixed-frame screens that are designed specifically for home theaters.
What Size Projector Screen Is Ideal for Your Home Theater Setup?
When selecting the ideal size for a projector screen in a home theater setup, consider the dimensions of the room, the viewing distance, and the aspect ratio of your projector. Here’s how to determine the best size:
-
Room Size: Measure the distance from the seating area to the screen. A common guideline is to multiply the diagonal measurement of the screen by 1.5 to 2.5 for optimal viewing distance. For example, if your screen is 100 inches diagonal, the seating should be approximately 8 to 12.5 feet away.
-
Aspect Ratio: The aspect ratio of your projector affects the screen size. Common ratios include 16:9 (widescreen for movies and TV shows) and 4:3 (more traditional). Make sure the screen fits the aspect ratio of your projector to avoid distortion.
-
Screen Height: For a comfortable viewing experience, the center of the screen should be at eye level when seated. This usually means the bottom of a 100-inch screen should be around 36 inches off the ground for optimal line of sight.
Choosing the right size ensures an immersive experience tailored to your home theater environment.
How Do Gain and Aspect Ratio Affect Your Viewing Pleasure?
- Gain: Gain refers to the screen’s ability to reflect light back to the viewer, measured as a ratio compared to a standard white surface.
- Aspect Ratio: Aspect ratio describes the proportional relationship between a screen’s width and height, impacting how the image fits within the viewing area.
Gain: A higher gain screen can produce a brighter image, making it suitable for rooms with ambient light; however, it can also narrow the viewing angle, which means that viewers sitting off to the side may not experience the same brightness and color fidelity. On the other hand, a lower gain screen provides a wider viewing angle and better color accuracy, making it ideal for dedicated home theaters where ambient light can be controlled.
Aspect Ratio: Common aspect ratios include 16:9, which is standard for most televisions and video content, and 2.35:1, often used for cinematic films. Choosing the right aspect ratio ensures that the image fills the screen appropriately without distortion or cropping, enhancing the immersive experience, particularly when watching movies designed for specific formats.
Why Is Ambient Light Consideration Crucial in Choosing a Projector Screen?
According to a study conducted by the Imaging Science Foundation, the gain of a projector screen—its ability to reflect light—plays a significant role in how well it can perform in various lighting conditions. Screens with higher gain are better suited for environments with ambient light, while those with lower gain are preferred for darker rooms. This factor is essential for achieving the best projector screen for home theater, as inadequate consideration of ambient light can lead to washed-out images and diminished contrast.
The underlying mechanism involves how light interacts with the surface of the screen. In brightly lit rooms, the additional light can overpower the projected image, causing a loss of detail and color saturation. For example, matte screens tend to diffuse light and are less reflective, making them ideal for darker settings, whereas high-gain screens can amplify the projected image but may also reflect ambient light, leading to potential glare. Understanding this relationship is vital for selecting a screen that will optimize performance in the specific lighting conditions of a home theater setup.
How Does Ambient Light Impact Your Screen Choice?
The impact of ambient light on your screen choice is crucial for achieving the best viewing experience in a home theater setting.
- Screen Gain: The gain of a projector screen determines how much light the screen reflects back to the viewer. A screen with higher gain is beneficial in environments with ambient light, as it reflects more light and enhances brightness, making images more visible despite the external lighting conditions.
- Screen Material: Different screen materials can absorb or reflect light differently. Matte surfaces tend to diffuse light evenly, reducing glare but may not be as bright in well-lit spaces, whereas glossy surfaces can enhance brightness but may create hot spots and glare, affecting viewing comfort.
- Ambient Light Rejection (ALR): ALR screens are specifically designed to reject light coming from above and the sides while still allowing the projector’s light to be reflected. This feature is particularly useful in rooms where controlling ambient light is challenging, as it helps maintain image quality and brightness.
- Color and Contrast: The color of the screen can affect how well colors and contrast are perceived under ambient light. Darker screens tend to enhance contrast and color saturation, making them suitable for darker rooms, while lighter screens might be better for brighter environments as they can handle ambient light without washing out the image.
- Installation Location: The placement of the screen in relation to windows and light sources plays a significant role. A screen positioned away from direct light can perform better, so considering the layout of your home theater is vital for optimizing the screen’s effectiveness against ambient light.
What Types of Screens Are Best for Bright Vs. Dark Environments?
| Screen Type | Best for Bright Environments | Best for Dark Environments |
|---|---|---|
| White Screens | Highly reflective, suitable for well-lit rooms, enhances brightness. | May lose contrast in low light, not ideal for dark environments. |
| Gray Screens | Reduces glare, providing better image quality in bright settings. | Improves black levels and contrast in dark rooms. |
| High Gain Screens | Increases brightness, ideal for environments with ambient light. | Can create hot spots and reduce viewing angles in dark settings. |
| Ambient Light Rejecting Screens | Designed to filter out ambient light, works well in bright rooms. | Maintains image quality and contrast in darker environments. |
| Ultra HD Screens | Optimized for high-resolution content, enhances detail in bright settings. | Maintains high detail and contrast, suitable for dark rooms. |
| Matte Screens | Minimizes glare while providing decent brightness. | Offers good contrast without reflection, ideal for low light. |
What Are the Top Recommendations for Home Theater Projector Screens?
When selecting the best projector screen for a home theater, several factors come into play, including material, size, and type of screen.
- Fixed Frame Screens: These screens are designed to remain in a set position, providing a taut surface that enhances image quality and eliminates wrinkles or creases.
- Motorized Screens: Motorized projector screens can be easily retracted and lowered with a remote control or a wall switch, making them perfect for multi-purpose rooms where the screen needs to be concealed when not in use.
- Portable Screens: Ideal for those who may need to set up and take down their home theater frequently, portable screens are lightweight and easy to transport, available in various sizes and materials.
- Painted Screens: Instead of traditional screens, some users opt for projector screen paint, which can be applied directly to a wall to create a custom-sized projection surface, often providing a seamless and aesthetically pleasing option.
- Ultra-Short Throw Screens: Specifically designed to work with ultra-short throw projectors, these screens allow you to set up your projector just inches away from the screen while still delivering a large, high-quality image.
Fixed frame screens are popular for their durability and superior image quality, as they provide a flat viewing surface that minimizes distortion. They typically come in various sizes and aspect ratios to match different projector outputs and room configurations.
Motorized screens offer convenience and a sleek appearance, as they can be hidden away when not in use, making them a great choice for living rooms or multi-functional spaces. The ease of operation through remote control adds to their user-friendly design.
Portable screens are perfect for those who travel or want flexibility in their setup. They often come with stands and can be set up quickly in different locations, making them suitable for outdoor movie nights or presentations.
Painted screens can provide an effective and low-cost alternative to traditional screens, as they allow homeowners to customize their viewing surface. The paint must be specially formulated for projection to ensure optimal brightness and color reproduction.
Ultra-short throw screens cater to users with limited space, allowing for a large projection from a very short distance. These screens are engineered to reduce shadows and maintain image quality, which is essential in small home theater setups.
What Features Should You Look for in Home Theater Projector Screens?
When selecting the best projector screen for a home theater, consider the following features:
- Screen Material: The material of the screen significantly impacts image quality, with options ranging from matte to high-gain surfaces. Matte screens are ideal for ambient light situations, while high-gain materials can enhance brightness in darker rooms.
- Screen Size: Choosing the right size is crucial for an immersive viewing experience, and it should complement the distance from the projector to the screen. A general rule of thumb is to have a screen size that allows viewers to sit at a distance of 1.5 to 2.5 times the diagonal screen size for optimal viewing.
- Aspect Ratio: The aspect ratio determines the shape of the screen and should match the content you are viewing. Common ratios include 16:9 for widescreen movies and 2.35:1 for cinematic experiences, so choosing the right one can enhance your viewing pleasure.
- Gain Factor: The gain factor indicates how much light the screen reflects, affecting brightness levels. A gain of 1.0 means the screen reflects light equally, while higher gain screens can produce a brighter image but may have narrower viewing angles.
- Portability: If you plan to move your screen or use it in various settings, consider a portable option. Portable screens often come in collapsible designs or as roll-up screens, making them easy to transport and set up.
- Screen Type: Various types of screens are available, including fixed-frame, retractable, and motorized. Fixed-frame screens provide a taut surface for optimal image quality, while retractable and motorized screens offer convenience for space-saving purposes.
- Installation Options: Assess whether you prefer a wall-mounted, ceiling-mounted, or freestanding screen, as installation methods can vary widely. Your choice will depend on the layout of your home theater and personal preferences for aesthetics and functionality.
- Price and Warranty: Finally, consider your budget and the warranty offered by the manufacturer. A higher price may correlate with better materials and features, but a solid warranty can provide peace of mind regarding the screen’s longevity and performance.
How Do Prices Vary Among Quality Home Theater Projector Screens?
Prices for quality home theater projector screens can vary significantly based on several factors including size, material, and features.
- Fixed Frame Screens: These screens offer a permanent setup with a sturdy frame that holds the screen taut, reducing wrinkles and enhancing image quality. They tend to be more expensive due to their construction and the materials used, often made from high-quality, reflective fabrics that improve contrast and brightness.
- Retractable Screens: Also known as motorized screens, these can be rolled up or down as needed. Prices can vary depending on the mechanism (manual vs. electric), size, and material, with higher-end models featuring remote controls and enhanced durability for frequent use.
- Portable Screens: Designed for easy transport and setup, these screens are typically less expensive than fixed or retractable options. They are made from lighter materials and can come in varying sizes, but may compromise on stability and image quality compared to more permanent solutions.
- Ambient Light Rejecting Screens: These specialized screens are designed to minimize the impact of ambient light, making them ideal for well-lit rooms. They are generally priced higher due to their advanced technology and materials that allow for better picture quality even in challenging lighting conditions.
- DIY Screens: For budget-conscious consumers, creating a projector screen using paint or fabric can be an economical option. While this can significantly lower costs, the quality may not match that of professionally manufactured screens, and the setup may require more effort and skill to achieve acceptable results.
What Are the Best Installation Practices for Setting Up Projector Screens?
The best installation practices for setting up projector screens ensure optimal viewing experience and longevity of the equipment.
- Screen Placement: The projector screen should be positioned at the correct height and distance from the projector to avoid distortion and ensure a comfortable viewing angle. Ideally, the center of the screen should be at eye level when seated, and the screen should be at least 1.5 times the diagonal size of the screen away from the projector for best image quality.
- Wall Material: The surface on which the projector screen is mounted can significantly impact image quality. A flat, smooth, and neutral-colored wall will reflect light evenly and enhance the projected image, while textured or colored walls may cause distortion or color bias.
- Lighting Control: To maximize the performance of the projector screen, ambient lighting should be controlled. Consider using blackout curtains or shades to eliminate outside light during movie screenings, and opt for dimmable lights to create a suitable atmosphere without affecting image clarity.
- Screen Type Selection: Choosing the right type of screen is crucial, as different materials and formats cater to various viewing environments. For home theaters, a matte white or high-gain screen can be ideal, depending on the projector’s brightness and the room’s lighting conditions.
- Secure Mounting: Ensure that the projector screen is securely mounted to prevent accidents and maintain alignment. Use appropriate hardware for the wall type, and verify that the mount can support the screen’s weight to avoid sagging or misalignment over time.
- Calibration: After installation, it is essential to calibrate both the projector and the screen settings to achieve the best picture quality. Adjust color settings, brightness, and contrast according to the specifics of the room and the projector to ensure a vibrant and clear image.
How Should You Properly Mount a Fixed Frame Projector Screen?
Properly mounting a fixed frame projector screen is essential for achieving the best viewing experience in a home theater.
- Selecting the Right Location: Choose a location that is free from obstructions and can be viewed comfortably from all seating positions.
- Measuring and Marking: Measure the desired height and width for the screen and use a level to mark the installation points accurately.
- Wall Preparation: Ensure the wall is clean and free from any debris, and check for any electrical wiring or plumbing that may interfere with mounting.
- Using the Right Hardware: Select appropriate mounting hardware based on the screen size and weight, including anchors if necessary for drywall.
- Installation of the Frame: Assemble the fixed frame according to the manufacturer’s instructions, ensuring that all pieces fit snugly together.
- Mounting the Screen: Secure the frame to the wall using the marked locations, ensuring it is level and firmly attached.
- Tension Adjustment: Adjust the tension on the screen fabric, if applicable, to prevent sagging and ensure a smooth projection surface.
- Final Checks: Test the setup by projecting images on the screen to check for alignment and ensure that it is positioned correctly for optimal viewing.
Selecting the Right Location involves considering factors like room layout, ambient light, and viewer distance to ensure the screen is positioned for maximum enjoyment. The ideal height places the screen at eye level when seated, while the width should allow for a comfortable viewing angle without straining the neck.
Measuring and Marking is crucial for achieving a professional look. Use a tape measure to determine the center point of the wall and mark the height, ensuring a level installation by using a spirit level to draw straight lines where the frame will be mounted.
Wall Preparation requires checking for a smooth surface and making sure there are no hidden wires or pipes. A clean wall allows for better adhesion and support, while avoiding any potential hazards ensures safety during installation.
Using the Right Hardware means selecting screws, anchors, and brackets that can support the weight of the fixed frame screen. Heavy-duty screws are recommended for drywall, while wall studs may require specific anchors to ensure the frame stays securely mounted.
Installation of the Frame involves carefully following the manufacturer’s instructions, which typically include assembling the corners and attaching the fabric. Proper assembly ensures that the screen maintains its shape and provides the best viewing surface.
Mounting the Screen requires careful alignment with the marked locations. It helps to have a second person to assist in holding the frame in place while you secure it to the wall, ensuring it remains level and straight.
Tension Adjustment is important to maintain a taut screen surface, which can greatly improve image quality by minimizing wrinkles and distortions. Follow the manufacturer’s guidelines for adjusting tension, usually through specific brackets or tensioning mechanisms.
Final Checks involve projecting a test image to confirm that the screen is aligned correctly with the projector and that the picture quality meets your expectations. This step allows for any necessary adjustments before fully completing the installation process.
What Tips Can Enhance the Setup of Motorized Projector Screens?
To enhance the setup of motorized projector screens for home theaters, consider the following tips:
- Screen Placement: Proper placement of the projector screen is crucial for optimal viewing. Aim to position the screen at a height where the center aligns with the viewer’s eye level, ensuring a comfortable viewing experience without neck strain.
- Room Lighting Control: Controlling ambient light in the room can significantly enhance image quality. Use blackout curtains or shades to eliminate light interference, and consider the screen’s gain rating to match your room’s specific lighting conditions.
- Screen Material Selection: The material of the projector screen affects the image quality and viewing experience. Choose a screen with a suitable surface such as matte white for general viewing or high-gain materials for brighter images in well-lit rooms.
- Proper Projector Alignment: Ensure that the projector is correctly aligned with the screen to avoid distortion. Use keystone correction features if available, and adjust the projector’s position to maintain a square image without any warping.
- Integration with Home Automation: Consider integrating your motorized projector screen with home automation systems for seamless control. This allows for easy adjustment of screen height and lighting settings through smart devices, enhancing convenience and user experience.
- Regular Maintenance: Keep the screen and projector clean and well-maintained for the best performance. Dust and smudges can degrade image quality, so regularly check and clean the screen surface according to manufacturer guidelines.