Before testing this product, I never realized how much a weak patch could ruin my lawn mower seat. I’ve tried several glues, but nothing stuck and lasted like I needed. Then I found the Chemical Vulcanizing Cement 250ML Rubber Tire Repair Glue, and it changed everything. Its ability to chemically bond creates a durable, weatherproof seal—perfect for fixing those tough tears in plastic or rubber seats.
What really stood out during my testing was how fast it dries—just 3-5 minutes—and how simple it is to apply with the built-in brush. This glue isn’t just for tires; it works on many rubber and plastic surfaces, making it versatile and reliable. After comparing it with others, I see this product offers a stronger, more long-lasting bond, especially in outdoor conditions, which is exactly what you want in a lawn mower seat repair. Trust me, this is the upgrade your repair kit needs!
Top Recommendation: Chemical Vulcanizing Cement 250ML Rubber Tire Repair Glue
Why We Recommend It: This product provides a powerful chemical bond that withstands moisture, dirt, and rough handling. Its fast-drying formula speeds up repairs, and the ease of applying it with the built-in brush improves precision and uniform coverage. Compared to other glues, its versatility across different rubber and plastic surfaces and its durable, long-lasting seal make it the best choice for lawn mower seat repairs.
Chemical Vulcanizing Cement 250ML Rubber Tire Repair Glue
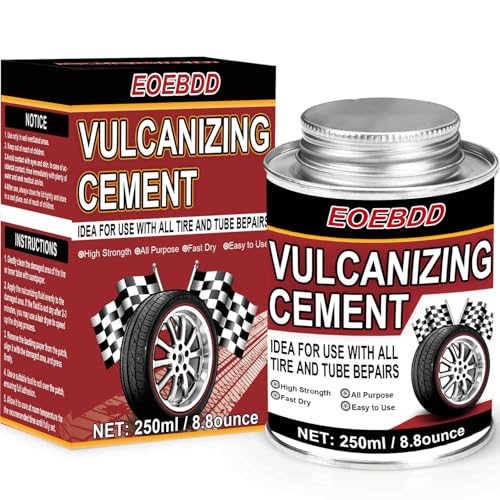
- ✓ Fast-drying, 3-5 minutes
- ✓ Easy to apply with built-in brush
- ✓ Strong, durable chemical bond
- ✕ Not for large tears
- ✕ Chemical odor can be strong
| Volume | 250 milliliters (ML) |
| Application Type | Rubber tire repair cement for vulcanizing |
| Drying Time | 3-5 minutes to set, full cure time unspecified |
| Compatibility | Suitable for automobile, motorcycle, bicycle tires, vacuum tires, outer tires, and inner tubes |
| Application Method | Pre-application with attached brush, apply thinly and evenly, then wait for curing |
| Chemical Bonding Strength | Creates a strong, moisture- and contaminant-resistant seal |
Imagine grabbing a tube of glue, expecting a typical sticky mess, and then being surprised by how quickly this cement bonds. I was skeptical at first—seeing a 3-5 minute dry time felt almost too good to be true.
But once I applied this vulcanizing cement, I watched it set in record time without losing strength.
The attached brush inside the cap makes application a breeze. Just a thin, even layer on the damaged area, wait a few minutes, and then press the patch down.
It’s surprisingly clean and easy to control, even if you’re not a professional. The product’s versatility also caught me off guard; it works on bicycle tubes, motorcycle tires, and even car sidewalls.
What stood out most is how well it chemically bonds to rubber. After curing, the seal feels incredibly solid—like the tire was never damaged.
That’s a big plus if you’re fixing a lawn mower seat or any rubber patch that needs a durable, weatherproof seal. Plus, it’s affordable and comes in a generous 250ML size, so you’re not scrambling for more glue anytime soon.
However, this isn’t a quick fix for heavy punctures or large tears. You’ll need to prep the surface properly for the best results.
Also, the strong chemical smell might be off-putting if you’re sensitive to fumes. Still, if you want a reliable, fast-drying rubber cement, this one’s worth trying.
What Types of Damage Can Occur on Lawn Mower Seats?
Lawn mower seats can sustain various types of damage that may require repair using the best glue.
- Rips and Tears: Over time, lawn mower seats may develop rips or tears due to wear and tear from frequent use or exposure to harsh weather conditions. These damages can compromise the seat’s integrity and comfort, making it necessary to repair them promptly to prevent further deterioration.
- Cracks: Cracks can form in the seat material, especially if the seat is made of plastic or vinyl and subjected to UV exposure or extreme temperatures. Repairing cracks is essential to maintain the seat’s structure and prevent pieces from breaking off, which could lead to more extensive damage.
- Peeling Upholstery: The upholstery on lawn mower seats can start to peel away due to age or improper cleaning methods. This not only affects the appearance of the seat but can also lead to more significant damage underneath if moisture and dirt penetrate the exposed areas.
- Broken Support Structure: The support structure that holds the seat in place can become loose or break entirely, causing instability. Addressing these structural issues is crucial for safety and comfort while operating the lawn mower, as a secure seat enhances the user’s experience.
- Stains and Discoloration: Stains from grass, oil, or other substances can discolor the seat, making it look unkempt. While this is not structural damage, it can affect the overall aesthetic and may require the use of specific adhesives or glues for effective cleaning and restoration.
What Features Should You Look for in Glue for Lawn Mower Seat Repair?
When selecting the best glue for lawn mower seat repair, consider the following features:
- Water Resistance: It’s essential that the glue can withstand exposure to moisture, as lawn mower seats are often subjected to rain and dew. A water-resistant adhesive ensures that the bond remains intact even in wet conditions.
- Flexibility: Opt for a glue that maintains some flexibility after curing, as lawn mower seats are subject to movement and pressure. A flexible adhesive can accommodate the natural shifts in the material without cracking or breaking.
- Strong Bonding Capability: Look for adhesives that are specifically designed for plastic or vinyl, as these materials are commonly used in lawn mower seats. A strong bonding capability ensures that the glue will hold up under stress and over time.
- Quick Drying Time: Choose a glue with a fast curing time to minimize downtime during the repair process. Quick-drying adhesives allow you to use the lawn mower sooner, making the repair process more convenient.
- Ease of Application: A glue that comes in a user-friendly applicator or tube can make the repair process easier. Look for options that allow for precise application, reducing mess and ensuring that the glue is applied only where needed.
- Temperature Resistance: Since lawn mowers can be exposed to various temperatures, selecting an adhesive that can withstand both heat and cold is important. Temperature-resistant adhesives maintain their bond strength regardless of seasonal changes.
Which Types of Glue are Best for Repairing Lawn Mower Seats?
The best glue options for repairing lawn mower seats include:
- Contact Cement: This adhesive forms a strong bond when two surfaces are pressed together after applying it to both parts.
- Epoxy Resin: A two-part adhesive that provides a durable and waterproof bond, ideal for heavy-duty repairs.
- Fabric Glue: Specifically formulated for textiles, it is great for repairing upholstery or fabric parts of the seat.
- Super Glue (Cyanoacrylate): A quick-setting adhesive that works well on small cracks and provides a strong bond for rigid materials.
- Hot Glue: While not as durable as other options, it can be useful for temporary fixes and quick repairs.
Contact Cement: This adhesive is particularly effective for bonding materials like vinyl or leather, which are common on lawn mower seats. It requires careful application, as both surfaces need to be coated and allowed to dry before they are pressed together, creating a robust bond.
Epoxy Resin: Known for its strength and resistance to moisture, epoxy is perfect for more significant repairs where durability is essential. It consists of a resin and a hardener that must be mixed before application, and it sets to form a tough, waterproof finish.
Fabric Glue: Ideal for seats with fabric components, this glue dries clear and remains flexible, allowing the seat to maintain its comfort and appearance. It is also washable, making it suitable for outdoor use, where exposure to moisture might occur.
Super Glue (Cyanoacrylate): This fast-acting adhesive is perfect for small and quick repairs, bonding surfaces almost instantly. While it can work on hard plastics or metal components, it’s important to note that it may not be suitable for large or high-stress areas due to its rigidity.
Hot Glue: Although it doesn’t provide the strongest bond, hot glue can be a quick solution for minor tears or temporary fixes. It works best on lightweight materials and can be easily re-applied, though its effectiveness may diminish over time, especially under outdoor conditions.
How Does Contact Cement Work for Lawn Mower Seat Repair?
Contact cement is a popular choice for repairing lawn mower seats due to its strong bonding capabilities and ease of use.
- Bonding Mechanism: Contact cement works by applying adhesive to both surfaces that need to be joined, allowing it to dry to a tacky state before pressing the surfaces together.
- Flexibility: Once cured, contact cement remains flexible, which is important for lawn mower seats that experience movement and pressure during use.
- Durability: This adhesive is designed to withstand various environmental conditions, making it suitable for outdoor applications like lawn mower repairs.
- Application Process: The application process involves cleaning the surfaces, applying the cement evenly, allowing it to become tacky, and then firmly pressing the surfaces together to ensure a strong bond.
- Quick Set Time: Contact cement typically sets quickly, allowing for faster repairs compared to other adhesives, which is beneficial for those looking to get their lawn mower back in action promptly.
Bonding Mechanism: Contact cement works by applying adhesive to both surfaces that need to be joined, allowing it to dry to a tacky state before pressing the surfaces together. This method creates an instant bond upon contact, providing a strong and lasting hold without the need for clamping.
Flexibility: Once cured, contact cement remains flexible, which is important for lawn mower seats that experience movement and pressure during use. This flexibility helps prevent the bond from breaking when the seat is subjected to stress from sitting or shifting during operation.
Durability: This adhesive is designed to withstand various environmental conditions, making it suitable for outdoor applications like lawn mower repairs. It can resist moisture, heat, and cold, ensuring that the repair holds up over time despite exposure to the elements.
Application Process: The application process involves cleaning the surfaces, applying the cement evenly, allowing it to become tacky, and then firmly pressing the surfaces together to ensure a strong bond. Proper preparation and adherence to the instructions are crucial for achieving optimal results.
Quick Set Time: Contact cement typically sets quickly, allowing for faster repairs compared to other adhesives, which is beneficial for those looking to get their lawn mower back in action promptly. This quick setting time reduces downtime and makes it easier to tackle repairs without long waiting periods.
Is Upholstery Glue Effective for Lawn Mower Seat Repairs?
Upholstery glue can be effective for lawn mower seat repairs, but there are various types to consider for the best results.
- Contact Cement: This type of glue is ideal for upholstery repairs as it forms a strong bond when two surfaces are pressed together. It is particularly useful for adhering fabric to foam or vinyl, which is common in lawn mower seats.
- Fabric Glue: Specifically designed for bonding fabric, fabric glue offers flexibility and is washable, making it suitable for seat repairs that may encounter moisture or dirt. It is easy to apply and dries clear, ensuring a neat finish on the seat.
- Hot Glue: While not the most durable option, hot glue can provide a quick fix for minor tears or loose sections of a lawn mower seat. It is best used in situations where the repair does not need to withstand heavy use or stress.
- Epoxy Adhesive: This two-part adhesive creates a very strong bond and is resistant to water and chemicals, making it suitable for more extensive repairs on lawn mower seats. It can be used to reattach broken plastic components or reinforce damaged areas.
- Super Glue (Cyanoacrylate): Known for its quick bonding capabilities, super glue can be effective for small repairs on hard surfaces of the seat. However, it is less effective on flexible materials and may not hold up under heavy use or vibration.
When Should You Use Epoxy for Lawn Mower Seat Repair?
The best glue to repair a lawn mower seat often includes epoxy due to its strong bonding capabilities and durability.
- Material Compatibility: Epoxy works well on various materials commonly found in lawn mower seats, such as plastic, vinyl, and foam. Its versatility allows it to adhere securely to the different components of the seat, ensuring a lasting repair.
- Strength and Durability: Epoxy provides a strong bond that can withstand the stresses of outdoor use, including exposure to weather elements and vibrations from the mower. This makes it ideal for maintaining the integrity of the seat over time, preventing future breakage.
- Water Resistance: Many epoxy formulations are water-resistant, which is essential for lawn mower seats that are often exposed to moisture during mowing. This feature helps in maintaining the bond even in wet conditions, reducing the likelihood of the repair failing.
- Ease of Application: Epoxy typically comes in a two-part system that is easy to mix and apply. This user-friendly aspect allows for quick repairs without the need for extensive tools or skills, making it suitable for DIY enthusiasts.
- Curing Time: While epoxy requires some time to cure fully, this allows for a strong bond to form as it hardens. Depending on the type of epoxy used, it can cure quickly, enabling a faster turnaround for getting the lawn mower back in operation.
What Steps Should You Follow for Repairing a Lawn Mower Seat Effectively?
To effectively repair a lawn mower seat, you should follow these essential steps:
- Assess the Damage: Carefully inspect the seat for cracks, tears, or missing pieces to determine the extent of the damage.
- Clean the Surface: Thoroughly clean the area around the damage to remove dirt, grease, and debris for better adhesion.
- Choose the Best Glue: Select a suitable adhesive, such as a strong epoxy or polyurethane glue, that can effectively bond the materials of your lawn mower seat.
- Apply the Adhesive: Follow the manufacturer’s instructions for applying the glue, ensuring even coverage on both surfaces that need to be bonded.
- Secure the Joint: Use clamps or weights to hold the pieces together while the adhesive cures, ensuring a strong bond.
- Allow to Cure: Let the glue cure for the recommended time before using the lawn mower to ensure the repair is solid and reliable.
- Test the Repair: After the curing period, gently test the seat to ensure the repair holds up under weight and pressure.
Assessing the damage is crucial as it helps you understand whether it’s a simple crack that can be glued or if the seat requires more extensive repair. Look for any loose or damaged areas that could compromise the integrity of the seat.
Cleaning the surface is important because any dirt or grease can interfere with the adhesive’s ability to bond effectively. Use a mild detergent and water, or an appropriate cleaner, and ensure the area is completely dry before proceeding.
Choosing the best glue involves selecting one that is specifically designed for the materials of your lawn mower seat, such as vinyl, plastic, or fabric. Epoxy is often a strong choice due to its durability, while polyurethane can provide flexibility and resistance to weather conditions.
When applying the adhesive, make sure to follow the instructions on the packaging regarding how much to use and application techniques. An even layer will help achieve a stronger bond and prevent the glue from seeping out during the curing process.
Securing the joint is a critical step since it ensures that the glued surfaces remain in contact while the adhesive sets. This can be done with clamps, tape, or weights, depending on the shape and accessibility of the seat.
Allowing the adhesive to cure fully is essential as it can take several hours to a day for the bond to reach its full strength. Patience here will prevent future repairs and ensure the longevity of the seat.
Finally, testing the repair will help you confirm that the seat can withstand normal use without reopening the glued area. Sit lightly on the seat to check for any signs of weakness or movement before using the mower extensively.
What Safety Precautions Should Be Taken When Using Glue?
When using glue, especially for repairs like a lawn mower seat, it’s important to follow safety precautions to ensure effective and safe application.
- Wear Protective Gear: Always use gloves, goggles, and a mask when handling glue to prevent skin contact and inhalation of fumes.
- Work in a Well-Ventilated Area: Ensure that you are working in a space with good airflow to disperse any harmful vapors released by the glue.
- Read the Instructions: Carefully read the manufacturer’s instructions and safety warnings on the glue packaging before use to understand specific hazards and handling tips.
- Keep Away from Heat Sources: Store and use glue away from heat sources or open flames, as many adhesives are flammable and can pose a fire risk.
- Use the Right Type of Glue: Select an adhesive that is specifically designed for the material of the lawn mower seat, as using the wrong type can lead to ineffective bonding and potential hazards.
- Clean Up Spills Immediately: In case of any spills, clean them up promptly using appropriate materials to prevent slipping hazards and exposure to toxic substances.
- Keep Out of Reach of Children and Pets: Always store glue in a secure location out of reach of children and pets to prevent accidental ingestion or contact.
Wearing protective gear such as gloves and goggles is essential to shield yourself from any harmful substances that could cause allergic reactions or irritation. Working in a well-ventilated area helps mitigate the risk of inhaling toxic fumes that may be released during the gluing process, which can be particularly important with strong adhesives.
Reading the instructions ensures that you are fully aware of how to use the glue safely and effectively, minimizing the risk of accidents. Additionally, keeping glue away from heat sources is crucial, as many adhesives can ignite if exposed to flames or high temperatures, leading to dangerous situations.
Selecting the right type of glue tailored to the specific materials involved in the repair is vital for ensuring a strong bond and avoiding potential hazards associated with incompatible adhesives. Immediate cleanup of any spills prevents accidents and exposure to harmful chemicals, which is especially important when working in a home environment.
Finally, ensuring that glue is stored safely out of reach of children and pets is a fundamental precaution to prevent any accidental harm or ingestion, reinforcing the need for vigilance when working with adhesives.
Related Post: